Zips, snaps and buttons from the 100buy Spreadsheet, replaced part by part
The fastenings that fail on coats, jackets, trousers and bags, sorted by the measurement each one needs: closed-tooth width for a zip, cap diameter for a snap, ligne for a button. Nothing here needs the item to go back to the seller.
Zip sliders, pulls and the gauge stamped on the slider
A zip has three parts that matter here: the chain (the two rows of teeth), the slider that runs along it, and the pull tab you hold. When a coat zip stops closing properly, the chain is usually fine and the slider has worn, so the teeth no longer lock behind it. That slider is a standard part, and replacing it is the most common zip repair there is.
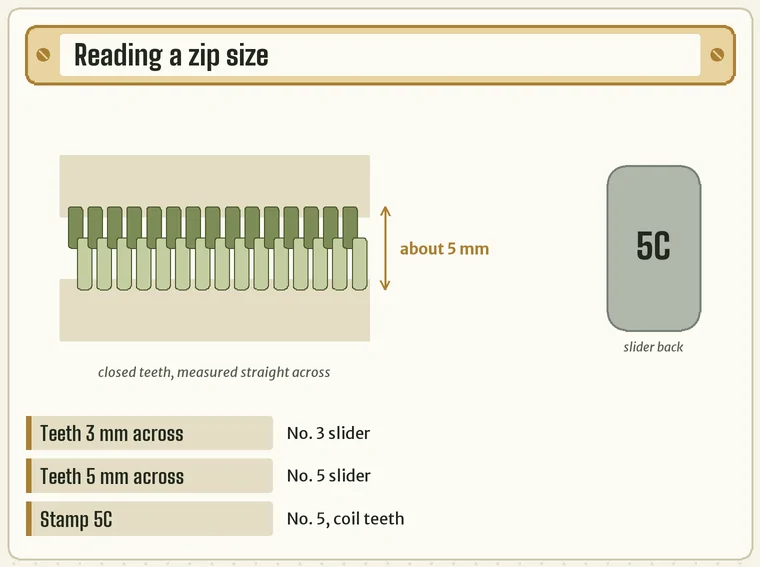
Zip sizes are given as a number that roughly equals the width of the closed teeth in millimetres: teeth about 5 mm across take a No. 5 slider, teeth about 3 mm across a No. 3. Jacket zips mostly fall between 3 and 5, with 4.5 often written as “45”. Better sliders carry that number on their back, sometimes with a letter for the tooth type, such as 5C for a No. 5 coil slider. Not every mark is a size, though, so close the zip and measure straight across the teeth (not the tape) before trusting the stamp. On a Chinese listing the size usually appears as a digit followed by “#”, as in 5#.
Coil, moulded and metal teeth
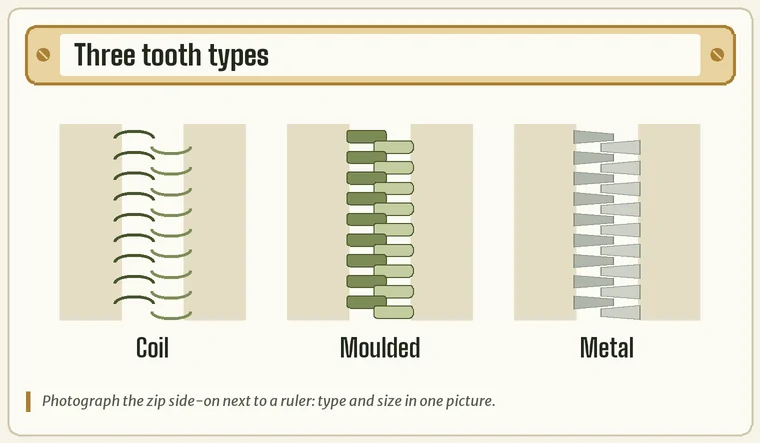
The size number alone does not decide fit; the tooth type does too. A coil zip has a continuous nylon spiral sewn to the tape and is the flexible kind found on hoodies, rucksacks and many light jackets. A moulded zip has separate plastic teeth fixed to the tape, chunky and common on outdoor coats. A metal zip has individual metal teeth and turns up on jeans, workwear and leather.
A slider is cut for one tooth type. A No. 5 coil slider will not run properly on No. 5 moulded teeth even though the number matches, so a listing that only gives a number is half an answer. Coil and moulded zips usually run from about No. 3 to No. 10, while metal zips cover a wider span. When in doubt, photograph the zip side-on next to a ruler: the tooth type is obvious from the side, and that photo is exactly what a parts seller will ask for.
Separating and closed-end zips
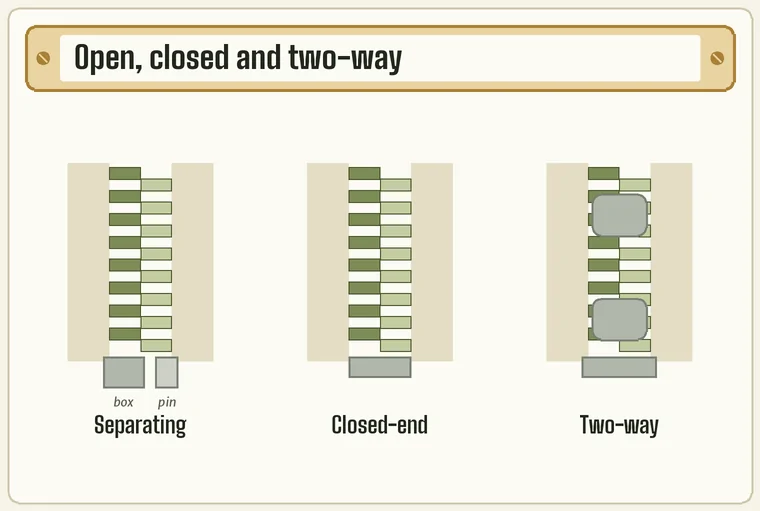
Coats and jackets use separating (open-end) zips: the two halves come fully apart, and at the bottom a pin slides into a small box to start the zip. Trousers, skirts and most bags use closed-end zips, joined at the bottom. Long coats and some rucksacks use two-way zips with two sliders facing each other, so the bottom can open while the top stays closed.
This matters for parts because the box and pin are not really spares. A cracked metal box at the hem of a coat usually means the whole zip has to be replaced, which is a sewing job rather than a part you clip on, and it sits outside this drawer. A worn slider on the same zip, by contrast, can be swapped: the usual method takes off the metal stop at the top of the chain, slides the old slider off and a new one on, and fits a new stop. Listings often sell sliders with a pair of top stops for that reason.
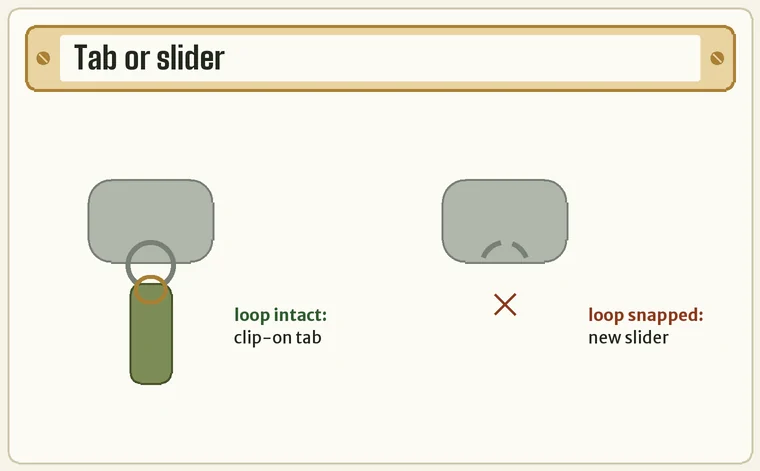
A pull tab on its own
If the tab has snapped off but the little loop on top of the slider is still there, you do not need a slider at all. Clip-on replacement pulls hook through that loop and close without tools, which is why they are sold in mixed packs of five or ten for coats, bags and luggage. A key ring or a short loop of cord does the same job in a pinch, and plenty of people keep it that way.
If the loop itself has broken away, a clip-on tab has nothing to grip and the slider is the part to buy. It is worth checking which of the two has happened before ordering, because the clip-on packs are cheap and the slider route needs the size and tooth type you measured above. On rucksacks, where pulls take the most abuse, a cord pull with a plastic end is often the more durable swap.
Snap fasteners come in four pieces
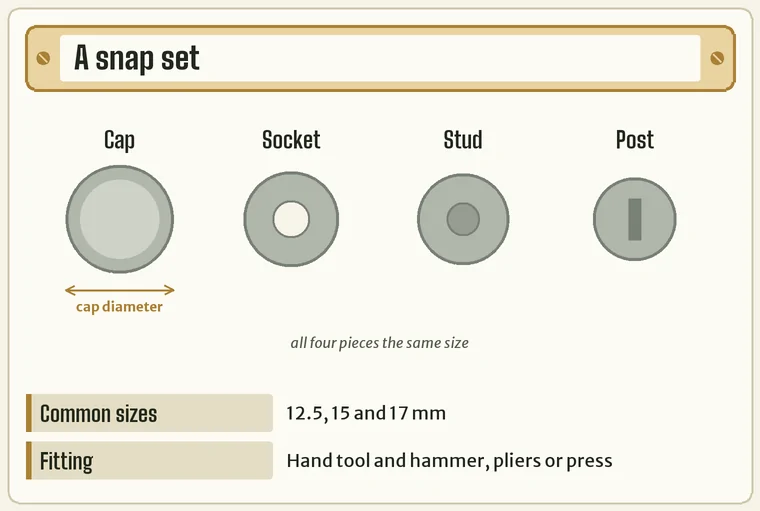
A snap fastener (press stud) is four parts, not two. On one side of the fabric a decorative cap is joined to a socket; on the other side a post is joined to the stud that clicks into the socket. All four have to be the same size, which is given by the cap’s diameter. On clothing 12.5 mm, 15 mm and 17 mm are the sizes you will meet most; heavier jackets lean towards the larger ones.
Snaps are set rather than sewn: the pieces are pressed together through the fabric with a small hand tool and a hammer, or with pliers or a press. Many listings sell packs of complete sets with a basic setting tool included, which is the sensible way to buy them for a single repair. Before ordering, check whether your jacket uses ring-prong snaps (a ring of small teeth that bite into thin fabric) or a solid post that needs a hole, because the two are set differently.
Sew-on buttons sized in ligne
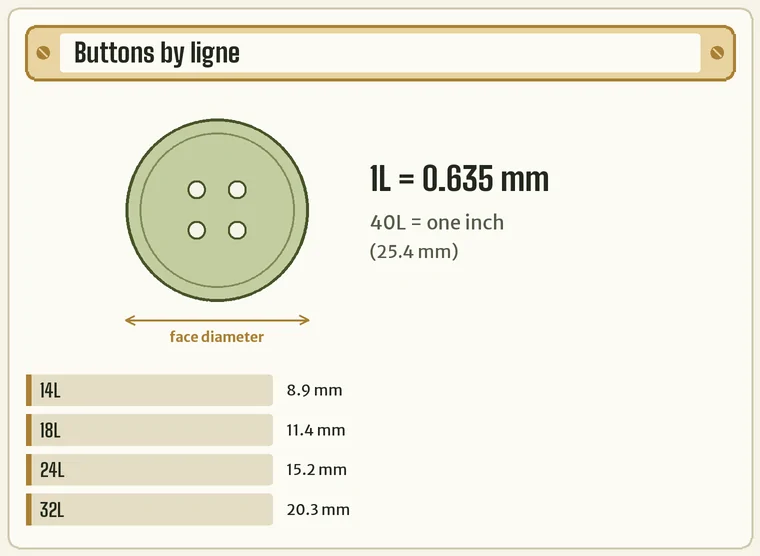
Sew-on buttons are measured across the face, and the trade unit is the ligne, written L: one ligne is 0.635 mm, so a 40L button is one inch (25.4 mm) across. Shirt buttons are usually around 14L to 18L, trouser waistbands 24L to 28L and blazer fronts about 32L. Chinese listings tend to give buttons in millimetres instead, so divide your measurement by 0.635 if a chart gives ligne.
Count the holes (two or four) and note whether the button has a shank underneath instead; a shank button sits proud of the fabric and swaps only with another shank. Buttons are nearly always sold in packs, so one order usually covers a spare for the inside seam as well. One detail from 100buy’s warehouse value-added list: it offers customised jobs on enquiry, and trimming buttonholes is one of them. That applies to new items still in the warehouse, not to the coat already in your wardrobe.
Jeans tack buttons and the hammer they need
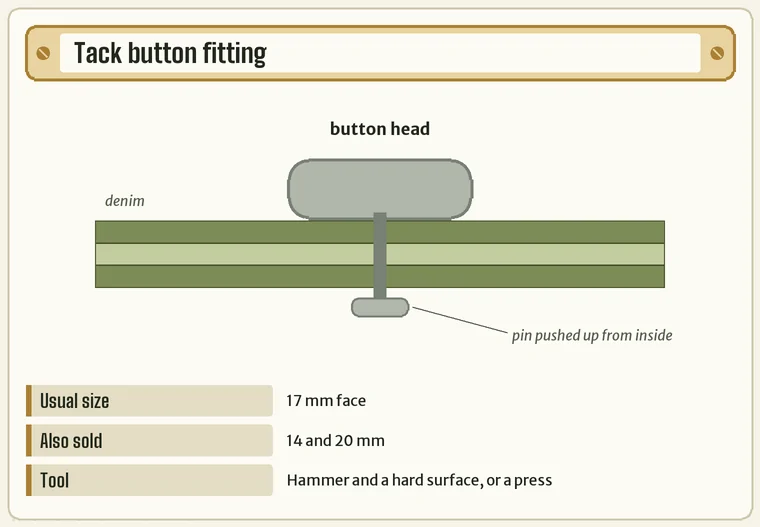
The button on a pair of jeans is a tack button: a metal head held on by a pin pushed up from inside the waistband, with no thread involved. They are sized by the face diameter, and 17 mm is by far the most common, with 14 mm and 20 mm also sold. A replacement pack gives you several heads and their pins.
Fitting one needs a hard, flat surface and a hammer, or a small press with matching dies; you push the pin through from the inside and strike the head home. Getting the old button out is usually the awkward part, and if the denim has torn around the hole the new button will pull through again unless the spot is reinforced first. There are also screw-together “no-sew” jeans buttons that need only a small screwdriver; they are easier to fit but sit slightly differently. Rivets on the pockets, by contrast, are not a sensible home repair.