
Measuring for spare parts before a 100buy Spreadsheet order
Every drawer on this site depends on one number per part. This page shows how to take each of them with a ruler, a caliper and a phone, and what to do when the reading falls between two sizes.
A ruler, a caliper and a phone camera
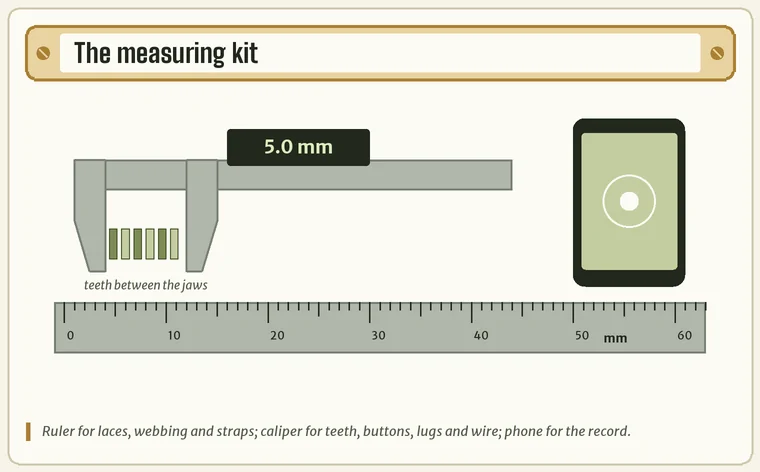
Every part in this drawer is bought by a number, and three cheap tools take all of them. A steel ruler marked in millimetres handles lace lengths, webbing and strap widths. A digital caliper, the kind sold for a few pounds, reads zip teeth, button faces, lug gaps and wire thickness to a tenth of a millimetre, which a ruler cannot. Your phone camera records the old part next to the ruler.
That photo is worth taking every time. It settles arguments with yourself later, it is exactly what a parts seller asks for when you query a size, and it is the picture to hold up against a warehouse photo once your order reaches 100buy. Write the number and its unit on a scrap of paper in the shot, so nobody confuses 20 mm with 2.0 cm on a small screen.
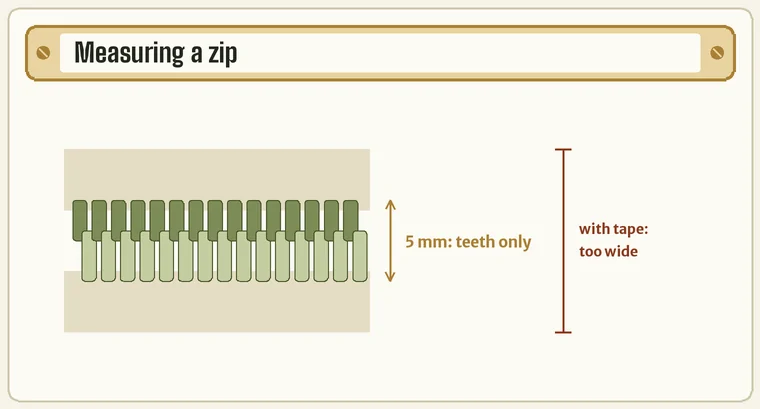
Zip teeth measured closed and straight across
Close the zip, then measure straight across the interlocked teeth with the caliper. Two mistakes account for most wrong sliders: measuring the fabric tape as well as the teeth, which adds several millimetres, and measuring an open zip, where the teeth splay. Round to the nearest whole size number, except where a 4.5 mm reading points to a No. 4.5.
If the slider has gone completely, the closed teeth are still the measurement, and you can close a short stretch by hand to take it. Then look at the zip side-on to name the tooth type (coil, moulded or metal) and photograph both. The zips drawer explains how the number and the type together pick the slider.
Buttons across the face
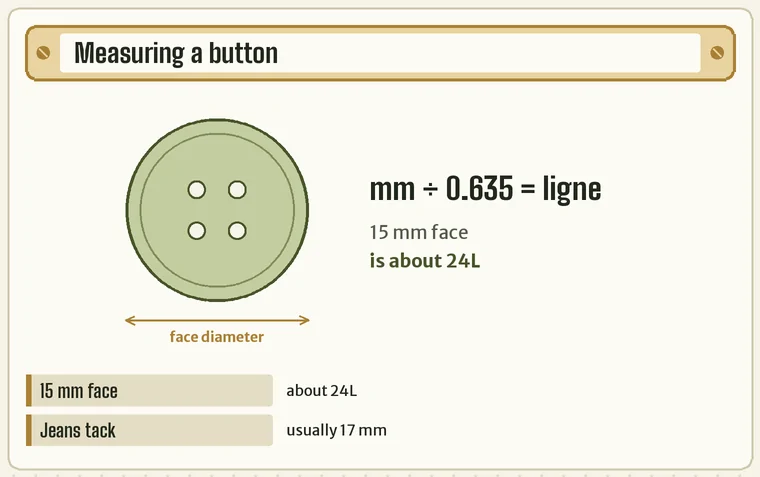
Measure a button across its face at the widest point, not its thickness and not the shank. If the only chart you can find is in ligne, divide the millimetres by 0.635: a 15 mm button is about 24L. Count the holes and check for a shank before you go looking.
For a tack button on jeans, measure the face of the head the same way; 17 mm is the usual answer. For a snap fastener, measure the cap, the decorative piece on the outside. When a garment has buttons of two sizes (front and cuffs, say), measure both, because packs are sold in a single size and it is easy to buy twenty of the wrong one.
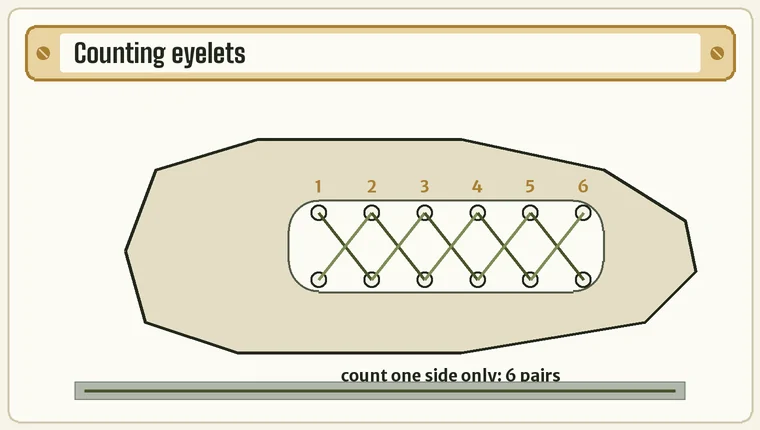
Eyelet pairs counted on one side
Count the eyelets down one side of the shoe from toe to collar; that is the pair count lace charts use. Do not count both sides, and include the top eyelet even if you do not usually lace it. Then look across the shoe: if the two rows sit far apart, plan on the next length up.
The most reliable number of all is the old lace itself, measured tip to tip with a ruler while it is pulled straight. If one lace has snapped, measure the survivor. Width comes next, measured flat across for a flat lace or across the diameter for a round one, because that decides whether a new lace passes the eyelets and which tips will grip it.
Webbing width inside the old buckle
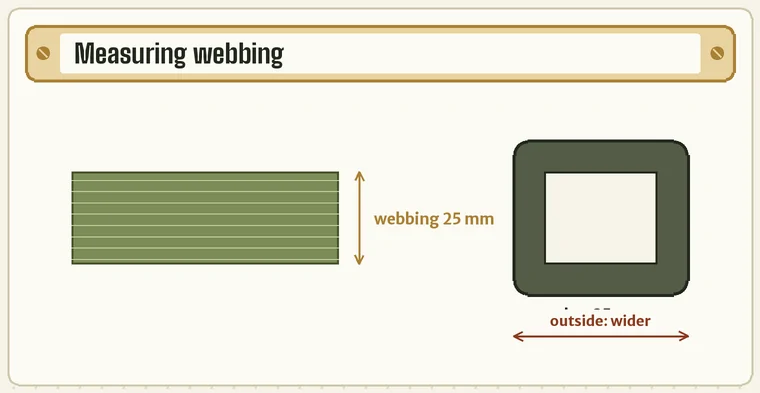
For any strap part, measure the webbing, laid flat, straight across. The buckle is wider than the webbing it takes, so a ruler across the old buckle gives a number that does not exist in any listing. If you can only reach the buckle, measure the inside of its slot instead.
Do the same for D-rings and swivel clips: the inside width of the straight side, which must be at least the strap’s width. On caps, count the holes and pegs on a snap strap and measure the width of a fabric strap. Note the thickness of stiff webbing too, because a thick strap can jam in a buckle made for thin strapping of the same nominal width.
Lug width from the inside, strap off
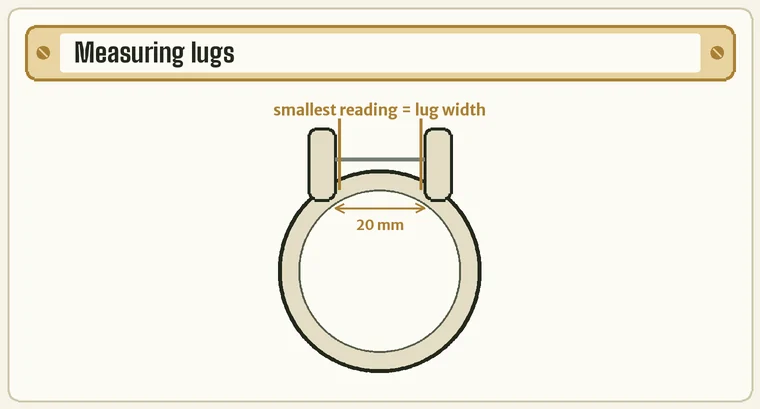
Take the strap off first. Zero the caliper with the jaws closed, then measure between the inner faces of the two lugs at the level of the spring bar holes, coming in from underneath the case. Rock the caliper slightly: tilt can only add to the reading, so the smallest number you see is the real width.
With only a ruler, hold it level with the case; a slight angle can make 19 mm look like 20 mm, and that single millimetre is the difference between a strap that sits and one that bunches. While the strap is off, measure the spring bar’s length and the thickness of its tube at the middle; those two numbers buy a pack of new bars.
Jump rings, wire first and then the hole
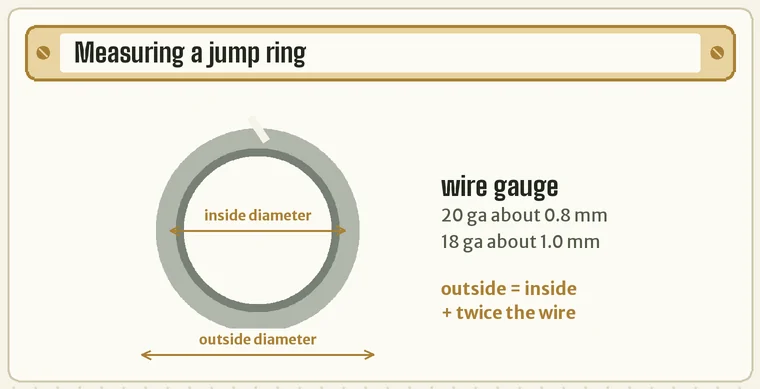
For a jump ring, measure the wire thickness first with the caliper, then the inside diameter across the hole. Convert the wire to a gauge with any jewellery chart (about 0.8 mm is 20 gauge, about 1.0 mm is 18) and check whether the listing gives inside or outside diameter before you compare.
If the listing gives outside diameter, add twice the wire thickness to your inside measurement. For a lobster clasp, measure its overall width and length, the two numbers clasps are listed by. For an earring post, measure its thickness near the tip; most are about 0.8 mm.
When a measurement falls between two sizes
Sometimes the number lands between standard sizes: 19.5 mm between the lugs, a zip that reads 4.2 mm, a lace length halfway between two chart rows. Do not split the difference in your head. Measure again with the caliper, at a slightly different spot, and if the reading holds, look for the odd size, because odd sizes exist (19 and 21 mm straps, No. 4.5 zips) precisely for this.
Where no odd size exists, the direction to round depends on the part. Laces round up, because a long lace can be tied off and a short one cannot. Straps and spring bars do not round at all: the width has to match. Cord locks round up in hole size. When you are still unsure, send the parts seller your photo with the ruler in it and ask; a seller who specialises in parts will usually answer with a size.